

What you’ll need
About your business
- Legal company name and registration number
- Jurisdiction of formation and incorporation date
- Registered office and operating addresses
- Tax ID and VAT number, where your country requires them
About your people and payouts
- Shareholders with 25% or more ownership
- Company directors
- Photo ID for the people who verify their identity
- Your business bank account details
Step 1: Create your Quidkey account
1
Sign up
Go to console.quidkey.com/signup and enter your first name, last name and work email. You can also sign up with Google.Quidkey doesn’t use passwords. You sign in with a one-time code sent to your email, or with Google.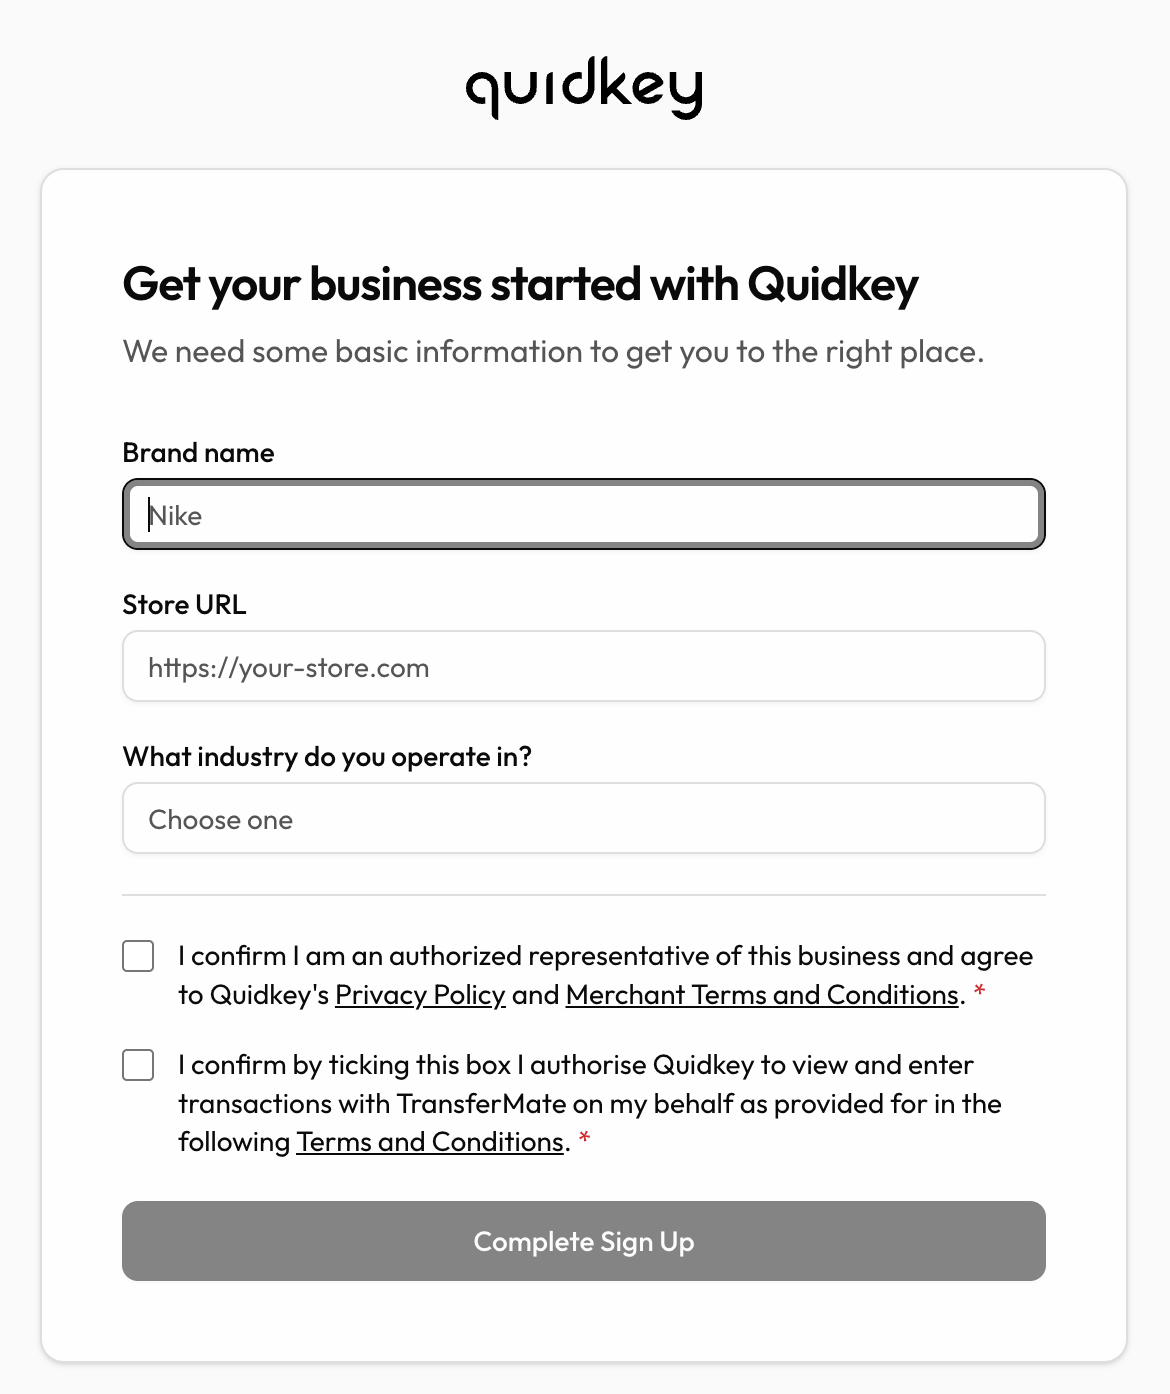
2
Verify your email
We send a 6-character code to your email address. Enter it to confirm your address and continue.
3
Tell us about your business
On the Get your business started with Quidkey screen, provide:
- Brand name as your customers know it
- Store URL
- The industry you operate in
4
Open the Set up page
Until your account is live, the sidebar shows Set up in place of Dashboard. The Set up page lists your tasks:
- Business details
- Shareholders and Directors (companies only)
- Bank account
- Review and submit
Step 2: Complete your business information
1
Add your business details
Select Start on Business details. Where Quidkey can search your country’s company register, you can find your company there to fill in the details the register holds. You can also enter the details manually.Provide your company’s legal structure and registration details: jurisdiction of formation, company structure, legal company name, company number, incorporation date, registered office and operating addresses, and a contact for the business.Tax ID and VAT number are requested where your country requires them. If you trade as a sole trader rather than a company, you’re asked for your personal details, citizenship and residence instead, and there is no Shareholders and Directors task.
2
Add shareholders and directors
Open Shareholders and Directors. The line above the table says who your company needs. Add details for every shareholder with 25% or more ownership, and:
- every director, if you’re incorporated in Australia
- one director, if you’re incorporated in the UK, EU or US
- Add their details to enter their information yourself
- Send them a link so they complete their own details. The link is copied for you to send. To have Quidkey email it, tick Send invitation via email.
A director who holds no shares can be added with 0% ownership. Anyone recorded as a shareholder needs an ownership share above 0%.
3
Verify identity
One director and one shareholder with 25% or more verify their identity through our verification partner, Onfido. The same person can be both. If nobody holds 25% or more, one director verifies.To choose who verifies, select Request ID check on their row:
- For someone whose details are saved, Copy link copies their verification link for you to send them. Quidkey doesn’t email it.
- For someone you sent a link to, their link already leads to the check after their details.
- For someone the register lists who isn’t added yet, enter their email to send them a link, as with Send them a link.
Step 3: Add a bank account
Select Start on Bank account and enter your business bank account details. Payouts are sent to this account. The details we ask for depend on the country your account is held in:
Every account also needs the account holder name, currency and country.
Step 4: Submit for compliance approval
Review and submit opens once the other tasks are done, including the identity checks. Select Review on it to see a summary of your business details, people and bank account, with Edit to change any part. Tick the statement confirming your details are accurate and complete, then select Submit to send them to Quidkey.If a partner or Quidkey set up your account, there is no submit step. Your details go to Quidkey once the other tasks are done.
- Live payments are enabled on your account
- Payouts are activated
- Your pricing is applied
Once you’re live, the sidebar shows Dashboard in place of Set up, and the dashboard shows You’re Live!. You can start accepting real payments.
Step 5: Add Pay by Bank to your checkout
Choose the integration that fits how you sell.Shopify
Install and connect our Shopify app in a few clicks. No code required, and you can run a test payment before going live
Payment Links
Share a link and collect a payment. Ideal for invoices and one-off charges
Embedded Flow (with Stripe)
Add Pay by Bank alongside your existing Stripe checkout
Payment API
Build directly against our API for full control over the payment flow
Find your API credentials
Every integration except Shopify’s one-click connect needs API credentials. In the Console, open Developers to see your Client ID and generate a Client secret.FAQ
Why do you need a bank account before approval?
Why do you need a bank account before approval?
Your bank account is part of the information our banking partners review, and it’s where your payouts are sent. Adding it up front means payouts are active the moment you’re approved.
My payout country isn't in the list above
My payout country isn't in the list above
Add the account anyway. We’ll collect the identifiers your account can carry and get in touch if we need anything else to route your payouts. Contact support@quidkey.com if you’d like to confirm coverage before you sign up.
Support
Questions? We’re here to help:- Email: support@quidkey.com
- Slack: We can create a shared channel for ongoing communication
- Video calls: Contact support@quidkey.com to schedule one